Pitch your Startup, App or Hardware or post a Startup Event or Startup Job

Guest Post by Jarrod Robinson. Jarrod is a Physical Education teacher from country Victoria Australia that is incurably entrepreneurial. He builds apps in his spare time and blogs and podcasts regularly and has built over 100 online products and services. You can find more about his apps and his experiments at Theteacherpreneur.com
In November 2014 I made the decision to get started on bringing my fourth major new web app to life. However, prior to tackling what would become my biggest development, I needed to ensure that people would actually purchase it. So with this in mind, It was time to repeat the process I outlined on a previous blog post, albeit with some changes.
The Process
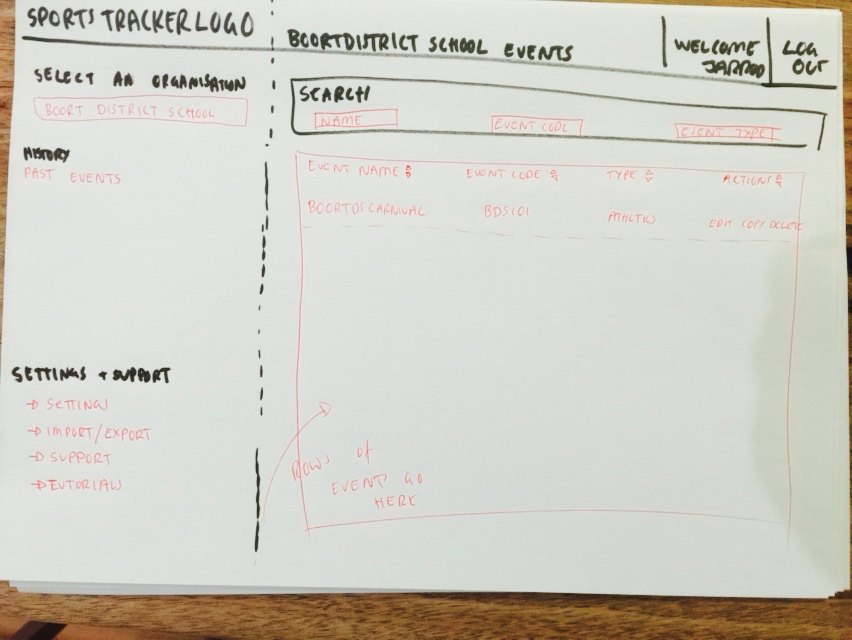
1. I immediately took out a Pen and Paper and got busy drawing how I imagined the user interface to look. This was a little more difficult as the type of software I had in mind had never been completed before. So I spent some time browsing popular designs on Dribble for inspiration.
See below for what resulted, which was incredibly rough, yet showcased how I imagined it would turn out.
2. The first step after crafting the UI was to hire a logo designer on Fiverr, who for $25, created a logo for the product I hoped I could build. 2 days later I had a really impressive logo which would be right at home in the actual release (if it was to ever happen)
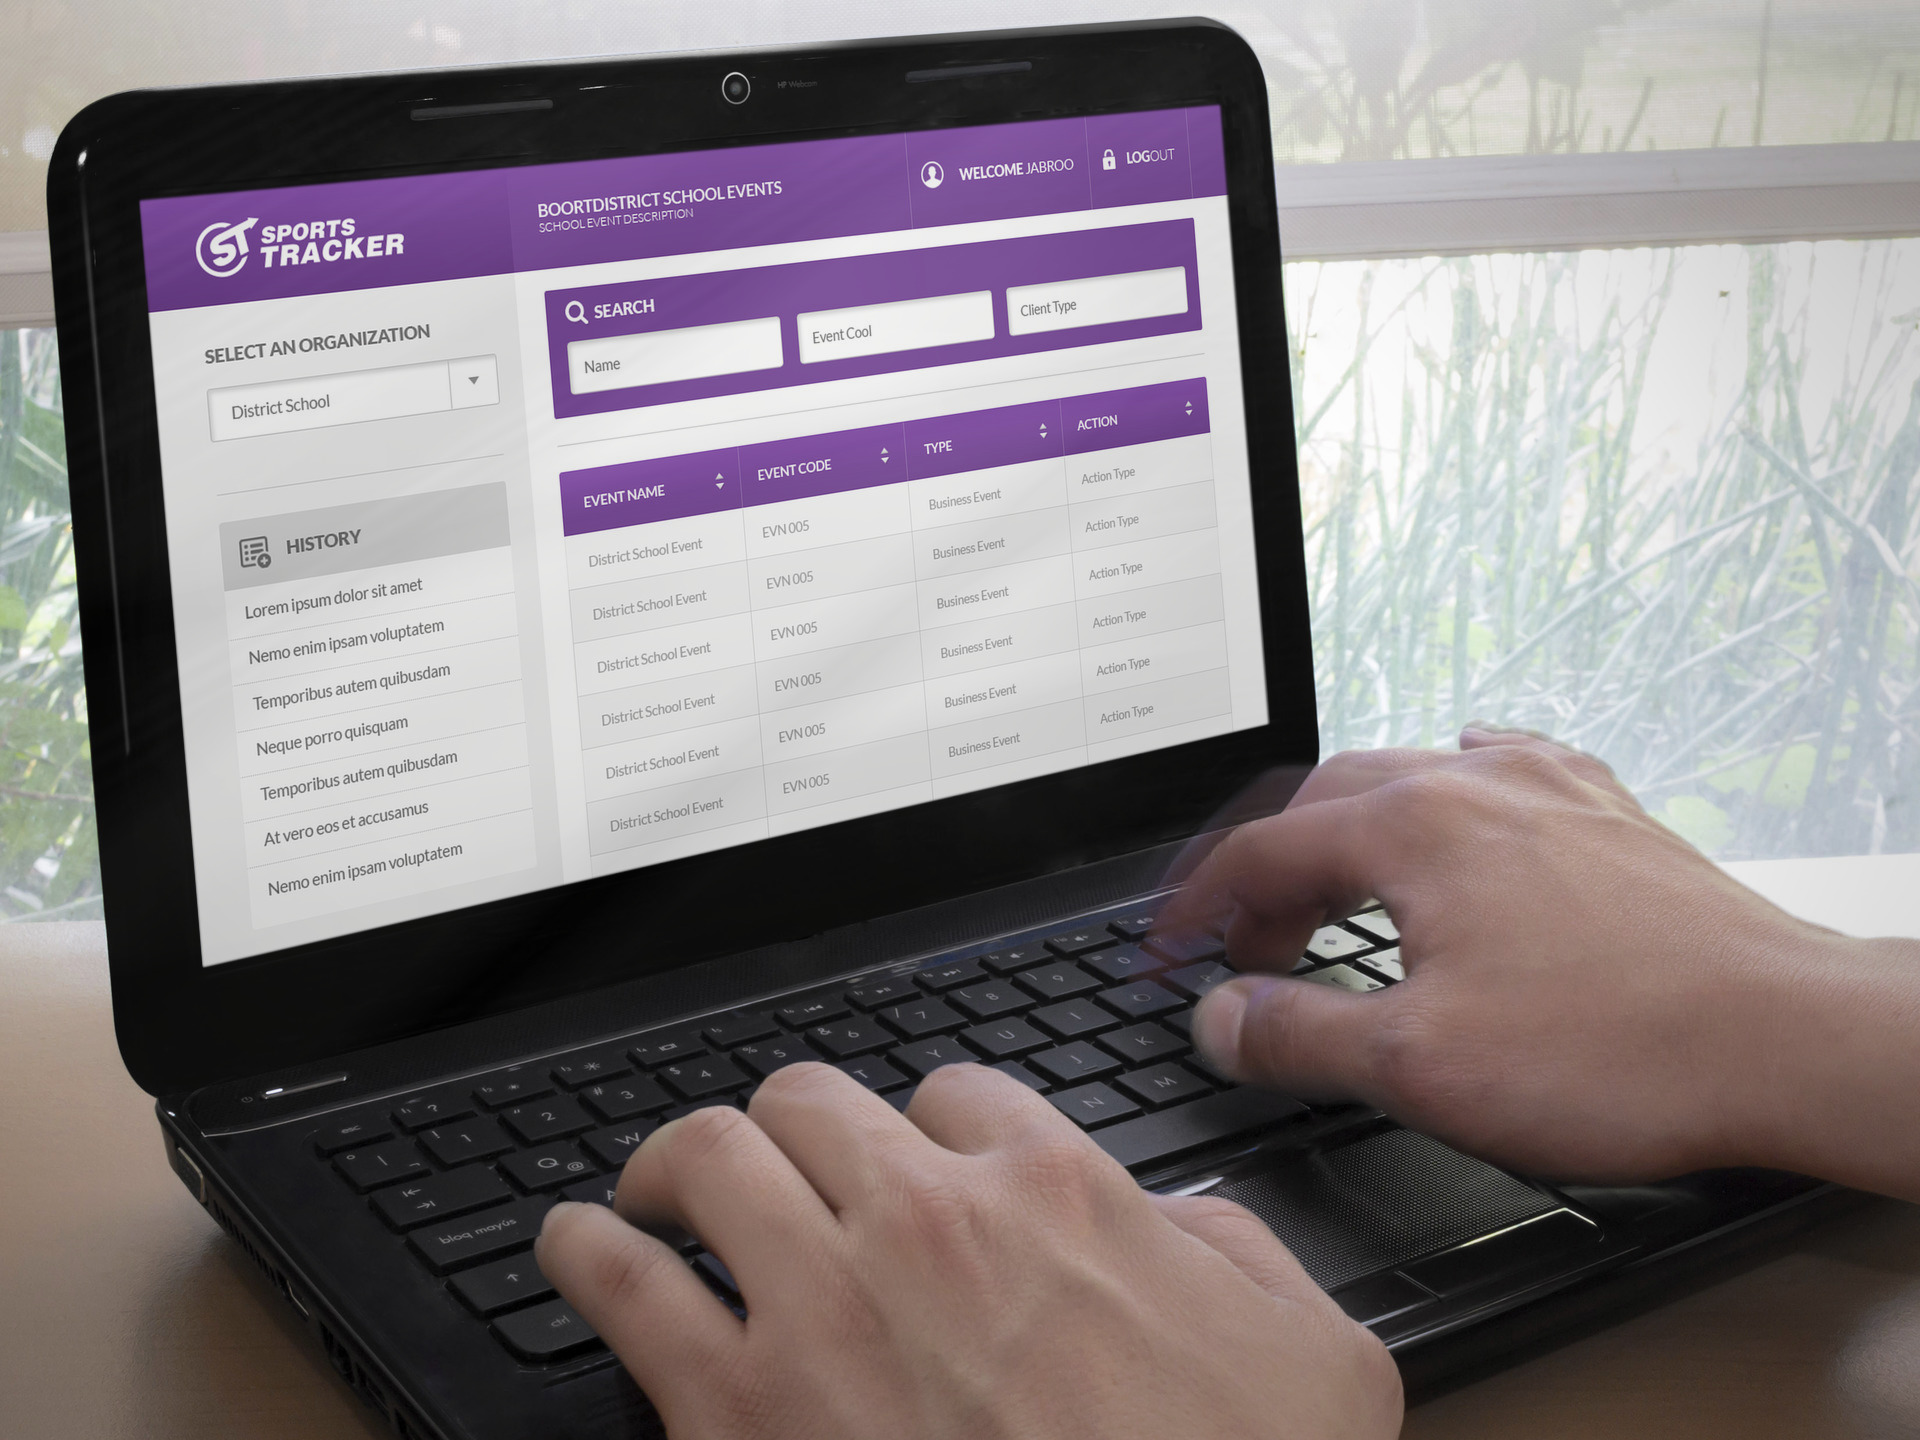
3. The very next step was to hire a cheap UI designer on www.fiverr.com who could turn this extremely basic UI drawing into an actual user interface that could be used to help validate and gain customers. I also used Paletton to decide on a complimentary color scheme that I then informed the designer of.
4. 3 days later and a total of $45, I received the following user interface that was designed around the drawing I had completed.
![]()
5. Enter www.placeit.net which I then used to create a realistic device mockup of the above UI in action. This resulted in the following. With a total cost of $8, it certainly added to the identity that this yet to be released product was beginning to assume. It also meant that I had some graphics to share via Social Media and any upcoming emails.
6. The next step was to produce a simple screen recording that showcased how I imagined the software to actually work. Remember at this stage the software was nothing more than an idea and a couple of mockups.
7. Following the completion of the video and mockup images, It was time to combine them into a sales page which could be used to pre sell the product. While you could easily achieve this quickly and for FREE with a tool such as www.gumroad.com, I decided to utilise a wordpress theme which enabled me to run my own crowd funding campaign. So for a total of $58 I purchased the Franklin Theme.
The theme installed in seconds and was DEAD simple to customize. While my project has since finished, you can see a new site I’m working on that uses the Franklin theme here
8.With the website now ready it was time to get started on promoting it to my audience, to see if anyone would be willing to purchase it before it was anything more than an idea. This resulted in me using the following methods;
- A Blog Post – While this method wont be something you can use if you’re just getting started, I was lucky enough to be able to utilise it to get initial idea traction.
- Facebook Promoted Post – I designed an advertisement on Facebook with a budget of $20 that targeted the people who would find this software interesting. It included a call to action that was all about solving the problem that the software was seeking to achieve. This resulted in the following engagement to the pre sale landing page.
![]()
8. Immediately following these two steps I had sold over $2,000 worth of the yet to be released software, which was around 20% of what the software would actually cost to build. With this in mind I needed to get this out to a wider audience via an email list that contained 500 subscribers who had previously purchased from me before. You can see the email that I sent right here.
9. The email included the mockup images I created above, the demo video and ONE Call to Action that enabled people to reserve the pre release software and lock in an amazing never to be repeated offer. Following this email I had moved pre release sales to $5,000 which was around 50% of the overall project estimated cost.
10. Following the 50% funding I made the decision to go ahead with the project regardless and immediately got started drafting the data structure of the web app (see below), including the full project specifications for my developer.
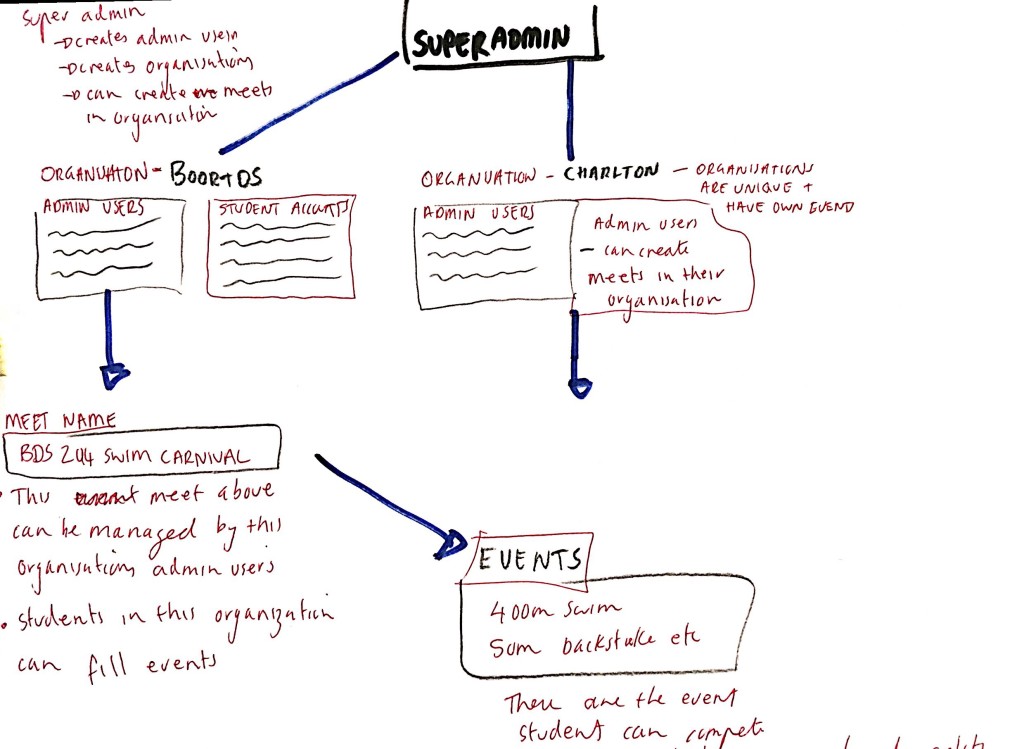
11. After completing the project specifications; It was time to pass this information and the $5,000 earned in the initial pre sale to the developer I had worked with on previous projects. This was in initial 50% payment made via Escrow on www.elance.com and set the wheels in motion to bring the project to life.
12. With the project underway; I needed to see about raising the next $5,000 dollars. With my online networks already tapped, I would need to go direct to the places in which those who would benefit from my product hang out. Schools and more specifically those who organise school sport.
13. The first step was to locate a list of contact details filled with people relevant to the software I would be looking to bring to life. In this instance, I found the governing body which had a neatly collated list of contact details which could be called and emailed. I also did a quick google search of schools in the region, whom I knew would directly be benefited by the software. From this list I picked 60 of the elite schools and organisations with high resources.
14. I then set my target on sending information about how I was seeking to solve the problem they were facing. Using the subject line “A Quick Question“.
Some of the other things I included in the 60 cold emails I sent were.
- Keeping It Short
- Making the email 100% about them and the problem they face
- Asked for one small action, which was for them to ‘learn more’ via the crowd funding page
- Following up (only once) after no reply. I used the Gmail Add Sidekick to see who was opening my emails, then followed up accordingly.
The following resource includes a list of other cold email strategies you can use. While this didn’t exist for me, its filled with amazing tips and templates.
15. Many of the schools I contacted directly via cold email elected to get on board early based on the fact they they would have the ability to impact the development of the product. I also made the purchase as friction free as possible by enabling them to pay via a school invoice which had a 30 day due date.
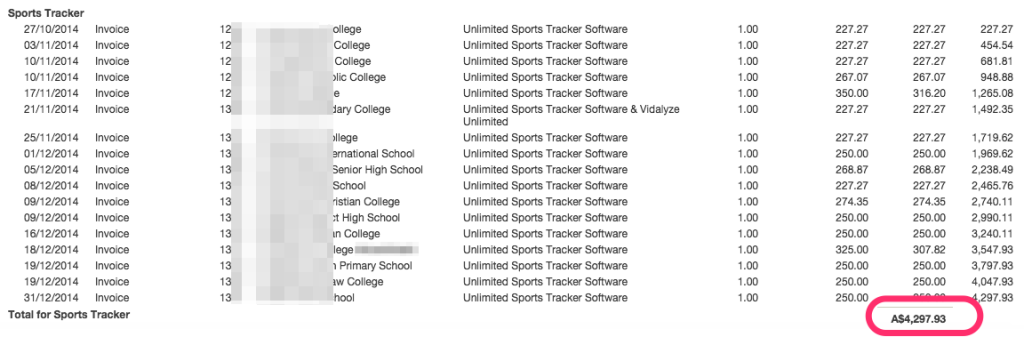
16. Following the successful 100% funding goal, I decided to email my wider list, who were in some ways much less suited to the product, but could be used to help raise an addition 1-2k. This resulted in an actual pre sale total of just on $15,000.
17. As the project developed the focus shifted to informing and communicating as much as possible with those whom had pre purchased. This included sending update emails that highlighted the features that had been suggested. Each update email also included quick links that encouraged people to forward to the project to a friend.
18. Finally after 4 months of solid development; Sports Tracker was ready for action. You can see exactly how it looks by visiting www.sportstrackerapp.com. The best part about the entire process at this point was that I was already 100% profitable, and we had a line up of around 50 schools who had gained access and were inside the software on day zero launch.
In the upcoming second part of this blog post, I take you behind the scenes of my brand new web startup. We’ll explore exactly how I’ve setup and automated the marketing efforts to turn trial users into lifetime customers. This includes providing a valet and setup service manned by Virtual Assistants to make the process for trial customers 100% remarkable.
Checkout Theteacherpreneur.com App Launchr Mentoring Program
Pitch your Startup, App or Hardware or post a Startup Event or Startup Job